Amazon Linux2+rails5+Nginx環境でのインストール記事があまりないようだったので記事にしました。
rootで作業します
|
1 |
$ sudo su - |
タイムゾーンの設定を行います
|
1 |
# timedatectl set-timezone Asia/Tokyo |
確認
|
1 2 3 4 5 6 7 8 9 10 |
# timedatectl status Local time: Thu 2019-02-28 13:18:21 JST Universal time: Thu 2019-02-28 04:18:21 UTC RTC time: Thu 2019-02-28 04:18:21 Time zone: Asia/Tokyo (JST, +0900) NTP enabled: yes NTP synchronized: no RTC in local TZ: no DST active: n/a |
|
1 2 3 |
# amazon-linux-extras install epel # yum install nodejs --enablerepo=epel # yum install -y git gcc gcc-c++ openssl-devel readline-devel zlib-devel sqlite-devel wget unzip |
WEBユーザの作成
|
1 2 3 4 5 |
$ groupadd rails $ useradd rails -g rails -d /home/rails -s /bin/bash $ id rails uid=1001(rails) gid=1001(rails) groups=1001(rails) |
Nginxのインストール
リポジトリの登録
|
1 2 3 4 5 6 7 |
$ vi /etc/yum.repos.d/nginx.repo [nginx] name=nginx repo baseurl=http://nginx.org/packages/mainline/centos/7/$basearch/ gpgcheck=0 enabled=1 |
インストール、自動起動設定
|
1 2 3 4 |
sudo yum install -y nginx sudo systemctl start nginx sudo systemctl enable nginx sudo systemctl status nginx |
nginx.conf設定
|
1 2 3 4 5 6 7 8 |
$ vi /etc/nginx/nginx.conf user nginx; ↓変更 #user nginx; user rails; |
バーチャルホストファイル設定
|
1 2 3 4 5 6 7 8 9 10 11 12 13 14 15 16 17 18 19 20 21 22 23 24 25 26 27 28 29 30 31 32 33 |
$ vi /etc/nginx/conf.d/app.example.net.conf upstream puma { server unix:/home/rails/vhosts/app.example.net/rubyOnRails/run/tmp/sockets/puma.sock fail_timeout=0; } server { server_name app.example.net; listen 80; root /home/rails/vhosts/app.example.net/public; try_files $uri/index.html $uri @puma; location @puma { proxy_read_timeout 300; proxy_connect_timeout 300; proxy_redirect off; proxy_set_header Host $host; proxy_set_header X-Forwarded-Proto $scheme; proxy_set_header X-Forwarded-For $proxy_add_x_forwarded_for; proxy_pass http://puma; } access_log /var/log/app.example.net.access.log; error_log /var/log/app.example.net.error.log; error_page 500 502 503 504 /500.html; client_max_body_size 4G; large_client_header_buffers 4 256k; keepalive_timeout 10; } |
Nginxに読み込ませる
|
1 2 3 |
nginx -t systemctl reload nginx systemctl status nginx |
railsユーザで作業するので、railsユーザに切り替える
|
1 |
# sudo su - rails |
rbenvインストール
|
1 |
$ git clone https://github.com/rbenv/rbenv.git ~/.rbenv |
PATH設定
|
1 2 3 |
$ echo '# rbenv' >> ~/.bash_profile $ echo 'export PATH="$HOME/.rbenv/bin:$PATH"' >> ~/.bash_profile $ echo 'eval "$(rbenv init -)"' >> ~/.bash_profile |
反映
|
1 |
$ exec $SHELL --login |
rbenvバージョン確認
|
1 2 |
$ rbenv --version rbenv 1.1.1-40-g483e7f9 |
ruby-build, rvenv-varsのインストール
|
1 2 |
$ git clone https://github.com/sstephenson/ruby-build.git ~/.rbenv/plugins/ruby-build $ git clone https://github.com/rbenv/rbenv-vars.git $HOME/.rbenv/plugins/rbenv-vars |
インストール可能なバージョンの確認
|
1 2 3 4 5 6 7 8 9 10 11 12 13 14 15 16 17 18 19 20 21 |
$ rbenv install --list (略) 2.5.3 2.6.0-dev 2.6.0-preview1 2.6.0-preview2 2.6.0-preview3 2.6.0-rc1 2.6.0-rc2 2.6.0 2.6.1 ←このバージョンを入れることにする 2.7.0-dev jruby-1.5.6 jruby-1.6.3 jruby-1.6.4 (略) |
ruby2.6.1インストール
|
1 2 3 4 5 6 |
$ rbenv install 2.6.1 Downloading ruby-2.6.1.tar.bz2... -> https://cache.ruby-lang.org/pub/ruby/2.6/ruby-2.6.1.tar.bz2 Installing ruby-2.6.1... Installed ruby-2.6.1 to /home/ec2-user/.rbenv/versions/2.6.1 |
読み込み
|
1 2 |
$ rbenv rehash $ rbenv global 2.6.1 |
rubyバージョン
|
1 2 |
$ ruby -v ruby 2.6.1p33 (2019-01-30 revision 66950) [x86_64-linux] |
gemインストール
|
1 2 3 4 5 6 7 8 9 10 11 12 13 14 15 16 17 18 19 |
gem install rails gem install puma gem install bundler gem install therubyracer gem install sqlite3 gem install sass-rails gem install uglifier gem install coffee-rails gem install turbolinks gem install jbuilder gem install bootsnap gem install byebug gem install web-console gem install listen gem install spring gem install spring-watcher-listen gem install capybara gem install selenium-webdriver gem install chromedriver-helper |
pumaバージョン確認
|
1 2 |
$ puma --version puma version 3.12.0 |
railsアプリケーション作成
|
1 2 |
rails new $HOME/vhosts/app.example.net/rubyOnRails ln -s /home/rails/vhosts/app.example.net/rubyOnRails/public /home/rails/vhosts/app.example.net |
pumaの起動
|
1 |
$ cd $HOME/vhosts/app.example.net/rubyOnRails |
|
1 2 3 4 5 6 7 8 9 10 11 12 13 14 15 16 17 18 19 20 21 22 23 24 25 26 |
$ bundle exec rails s => Booting Puma => Rails 5.2.2 application starting in development => Run `rails server -h` for more startup options Puma starting in single mode... * Version 3.12.0 (ruby 2.6.1-p33), codename: Llamas in Pajamas * Min threads: 5, max threads: 5 * Environment: development * Listening on unix:/home/rails/vhosts/app.example.net/rubyOnRails/run/tmp/sockets/puma.sock Use Ctrl-C to stop Started GET "/" for 13.231.122.32 at 2019-02-28 17:21:26 +0900 Cannot render console from 13.231.122.32! Allowed networks: 127.0.0.1, ::1, 127.0.0.0/127.255.255.255 Processing by Rails::WelcomeController#index as */* Rendering /home/rails/.rbenv/versions/2.6.1/lib/ruby/gems/2.6.0/gems/railties-5.2.2/lib/rails/templates/rails/welcome/index.html.erb Rendered /home/rails/.rbenv/versions/2.6.1/lib/ruby/gems/2.6.0/gems/railties-5.2.2/lib/rails/templates/rails/welcome/index.html.erb (3.2ms) Completed 200 OK in 36ms (Views: 28.6ms | ActiveRecord: 0.0ms) Started GET "/" for 150.249.197.69 at 2019-02-28 17:21:35 +0900 Cannot render console from 150.249.197.69! Allowed networks: 127.0.0.1, ::1, 127.0.0.0/127.255.255.255 Processing by Rails::WelcomeController#index as HTML Rendering /home/rails/.rbenv/versions/2.6.1/lib/ruby/gems/2.6.0/gems/railties-5.2.2/lib/rails/templates/rails/welcome/index.html.erb Rendered /home/rails/.rbenv/versions/2.6.1/lib/ruby/gems/2.6.0/gems/railties-5.2.2/lib/rails/templates/rails/welcome/index.html.erb (2.0ms) Completed 200 OK in 3ms (Views: 2.7ms | ActiveRecord: 0.0ms) |
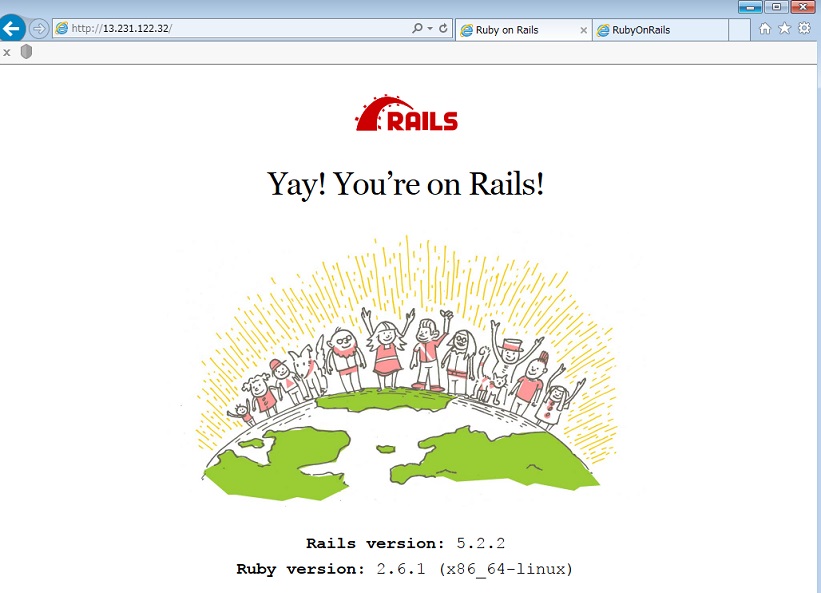
表示を確認しよう

http://IPアドレス/
pumaをソケットに切り替える
|
1 2 3 4 5 6 7 8 9 |
$ vi /home/rails/vhosts/app.example.net/rubyOnRails/config/puma.rb port ENV.fetch("PORT") { 3000 } ↓変更 #port ENV.fetch("PORT") { 3000 } bind "unix:/home/rails/vhosts/app.example.net/rubyOnRails/run/tmp/sockets/puma.sock" |
ソケット用のディレクトリを作成
|
1 2 |
mkdir -p /home/rails/vhosts/app.example.net/rubyOnRails/run/tmp/pids mkdir -p /home/rails/vhosts/app.example.net/rubyOnRails/run/tmp/sockets |
アプリのディレクトリに移動してpuma起動
|
1 2 |
$ cd /home/rails/vhosts/app.example.net/rubyOnRails/ $ bundle exec puma -d -C /home/rails/vhosts/app.example.net/rubyOnRails/config/puma.rb |
Gemfile編集
|
1 2 3 4 5 6 7 8 |
$ vi /home/rails/vhosts/app.example.net/rubyOnRails/Gemfile gem 'sqlite3' ↓変更 #gem 'sqlite3' gem 'sqlite3', '~> 1.3.6' |
bundeでインストール
|
1 2 3 4 5 6 7 8 9 10 11 12 13 14 15 16 |
$ bundle install Using tilt 2.0.9 Using sass-rails 5.0.7 Using selenium-webdriver 3.141.0 Using spring 2.0.2 Using spring-watcher-listen 2.0.1 Fetching sqlite3 1.3.13 (was 1.4.0) Installing sqlite3 1.3.13 (was 1.4.0) with native extensions ←インストール出来た Using turbolinks-source 5.2.0 Using turbolinks 5.2.0 Using uglifier 4.1.20 Using web-console 3.7.0 Bundle complete! 18 Gemfile dependencies, 79 gems now installed. Use `bundle info [gemname]` to see where a bundled gem is installed. |
rails generateでsampleコントローラの作成
|
1 2 3 4 5 6 7 8 9 10 11 12 13 14 15 16 |
$ rails generate controller sample Running via Spring preloader in process 4015 create app/controllers/sample_controller.rb invoke erb create app/views/sample invoke test_unit create test/controllers/sample_controller_test.rb invoke helper create app/helpers/sample_helper.rb invoke test_unit invoke assets invoke coffee create app/assets/javascripts/sample.coffee invoke scss create app/assets/stylesheets/sample.scss |
sampleコントローラを編集します
|
1 2 3 4 5 6 7 8 9 10 11 12 13 14 |
$ vi app/controllers/sample_controller.rb class SampleController < ApplicationController end ↓変更 class SampleController < ApplicationController def index end end |
sampleビューindex.html.erbの作成
|
1 2 3 4 5 6 7 8 9 |
$ vi /home/rails/vhosts/app.example.net/rubyOnRails/app/views/sample/index.html.erb <!DOCTYPE html> <html> <head></head> <body> <p>Hello World!</p> </body> </html> |
ルーティング設定
|
1 2 3 4 5 6 7 8 9 10 11 12 13 14 15 16 |
$ vi /home/rails/vhosts/app.example.net/rubyOnRails/config/routes.rb Rails.application.routes.draw do # For details on the DSL available within this file, see http://guides.rubyonrails.org/routing.html end ↓変更 Sample.application.routes.draw do # For details on the DSL available within this file, see http://guides.rubyonrails.org/routing.html root 'sample#index' end |
rootを設定します。
表示確認

http://IPアドレス/
大丈夫のようですね、
お疲れ様です。

