

フレームワークのインストールまではコピペでなんとなく環境構築出来たけれど、「それからどうすれば良いの?」を解決する記事です。
この記事を書いておけば誰かにLaravelに関して聞かれても「この記事を見てね!」でおっけーになるかな。
条件
- Laravelバージョン5.7
- Laravel環境構築済
- DBサーバ構築済
- DBサーバにテーブルとレコードがある
この記事の対象
- PHPとクラスがわかる
- Laravelは初めて
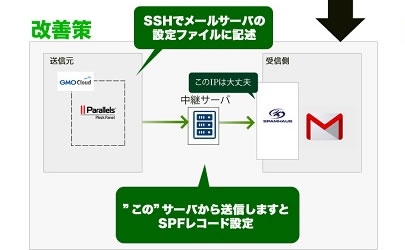
フレームワークのいわゆるMVCの流れはこんなの

流れ
- ルーティング→ Controller → Model → Controller → View
- ルーティングで処理の行き先を決めて後は図の通りの流れになります。
- ControllerはURLから処理を振り分ける
- Modelは処理のみを行いControllerに渡す
- ControllerはViewに渡す
- Viewは表示のみ行う
大まかなMVCの流れはこうなります。
この他にLaravelにはRequestやMiddlewareなどといった概念があるよ、それはMVCをこの記事で覚えてから。フレームワーク毎の深堀りは余裕が出来たら覚えれば良いと思うんだ。
DBに接続する.envを設定しよう
# vi laravel/.env

APP_NAME=Laravel
APP_ENV=local
APP_KEY=
APP_DEBUG=true
APP_URL=http://localhost

LOG_CHANNEL=stack

DB_CONNECTION=mysql
DB_HOST=192.168.11.102 ← localhost, IPなどDBサーバを指定する
DB_PORT=3306
DB_DATABASE=sampledb ← DB名を指定
DB_USERNAME=sampledbuser ← DBユーザを指定
DB_PASSWORD=sampledbpassword ← DBパスワードを指定

(略)
レイアウトを作成しよう
表示する共通パーツといったひな形を作っていくよ
# cd laravel/resources/views
どんなファイルがあるかな?見てみようね
$ ls
app.blade.php  auth  emails  errors  home.blade.php vendor  welcome.blade.php
こうなっているので、
「layouts」ディレクトリを作成しよう
$ mkdir laravel/resources/views/layouts
ひな形ファイル「layout.blade.php」を作成しよう
$ vi laravel/resources/views/layouts/layout.blade.php


<!DOCTYPE HTML>
<html lang="ja">
<head>
    <meta charset="UTF-8">
    <title>@yield('title')</title>
    <meta name="viewport" content="width=device-width, initial-scale=1.0">
    <link href="https://maxcdn.bootstrapcdn.com/bootstrap/3.3.4/css/bootstrap.min.css" rel="stylesheet" media="screen"
>
    <link href="/css/sticky-footer.css" rel="stylesheet" media="screen">

</head>
<body>
<!-- ヘッダー -->
@include('layouts.partials.header')

<div class="container">

  <div class="row" id="content">
  <div class="col-md-9">
  <!-- コンテンツ -->
  @yield('content')
  </div>
  </div>

</div>


<!-- フッター -->
@include('layouts.partials.footer')

<script src="https://ajax.googleapis.com/ajax/libs/jquery/1.11.2/jquery.min.js"></script>
<script src="https://maxcdn.bootstrapcdn.com/bootstrap/3.3.4/js/bootstrap.min.js"></script>
</body>
</html>
パーツ格納ディレクトリ「partials」を作成しよう
$ mkdir laravel/resources/views/layouts/partials
ヘッダーファイルの作成
$ vi laravel/resources/views/layouts/partials/header.blade.php


<!-- header & grobal navi -->
<nav class="navbar navbar-default" style="background-color: #FFFFFF;">
  <div class="container-fluid">
  <div class="navbar-header">
  <button type="button" class="navbar-toggle collapsed" data-toggle="collapse" data-target="#navbarEexample2">
  <span class="sr-only">Toggle navigation</span>
  <span class="icon-bar"></span>
  <span class="icon-bar"></span>
  <span class="icon-bar"></span>
  </button>
  <a class="navbar-brand" href="/">
  <img alt="Sample掲示板なのだ" src="/img/logo.png" style="height: 20px;">
  </a>
  </div>

  <div class="collapse navbar-collapse" id="navbarEexample2">
  <ul class="nav navbar-nav">
  <li class="active"><a href="/">メニュー</a></li>
  <li><a href="/add">新規登録</a></li>
  </ul>
  </div>
  </div>
</nav>
フッターファイルの作成するよ
$ vi laravel/resources/views/layouts/partials/footer.blade.php

<!-- footer -->
<footer class="footer">
  <div class="container">
  <p class="text-muted">Copyright (C) サンプル掲示板運営委員会 All Rights Reserved.</p>
  </div>
</footer>
これを記述すると「俺の城」感が出るからおすすめだね。
Modelを作成しよう
Sampleモデルを作成します
プロジェクトのディレクトリに移動して・・・
$ cd laravel/
appディレクトリがごちゃごちゃしないようにModelを格納するModelsディレクトリを作るよ!
$ mkdir laravel/app/Models
“ここ”で君の中に眠るartisanを解き放て!
$ php artisan make:model Models/Sample
凄い力だ、無からSampleモデルのひな形を作れてしまうなんて。
Sampleモデルのひな形が作成されているのを確認したら編集しようね
$ vi laravel/app/Models/Sample.php

<?php namespace App\Models;

use Illuminate\Database\Eloquent\Model;
use Illuminate\Support\Facades\DB; // ←追加 ●DBを操作するのにこれは必須
use Illuminate\Http\Request; // ←追加 ●きっと後で使うよ

class Sample extends Model {

    protected $table = 'samples';             // テーブル名
    protected $primaryKey = 'sample_id';      // PK
    protected $guarded = array('sample_id');  // PK

    public function getList(){
        $items = DB::table('samples')
                      ->select('samples.*')
                      ->orderBy('samples.sample_date', 'DESC')
                      ->paginate(50);
        return $items;
    }

}
解説
DB::table('samples')
                      ->select('samples.*')
                      ->orderBy('samples.sample_date', 'DESC')
                      ->paginate(50);
上記は下記クエリと同じ意味だよ。
SELECT * FROM samples ORDER BY sample_date DESC;
直接クエリを書くことも出来るけれどLaravelのフレームワークの作法に従って記述するとLaravel側でSQLインジェクションといった罠から守り、コーディングする人のセキュリティを担保してくれるんだ!
そうだね、直接クエリを叩き込むことでしか実装出来ないSQLといったものもあると思う、そういう場合は慎重に。通常は可能な限りLaravelの作法に従った方が安心だ。
この最後の記述はページャを後で表示させるのに必要なんだ。
->paginate(50);
頭の片隅に覚えておいてね。
コントローラを作成しよう
プロジェクトのディレクトリに移動して・・・
cd laravel/
勝負は今! “ここ”で決める、artisan!
php artisan make:controller SampleController
これぞ天意、Sampleコントローラのひな形が創造された。
indexを表示させるActionのindex()関数を設定しよう
動作
- Sampleコントローラのアクションであるindex()が発動
- Sampleモデルで記述したgetList()関数を発動させる
→レコードを根こそぎ取得する - Viewに$items変数として抱え込んだままsample/index.blade.phpにページ遷移させるよ
vi laravel/app/Http/Controllers/SampleController.php

<?php namespace App\Http\Controllers;

use App\Http\Requests;
use App\Http\Controllers\Controller;
use App\Models\Sample; // ←追加 ●Sampleモデルを呼び出すよ

use Illuminate\Http\Request;

class SampleController extends Controller {

        /**
         * Display a listing of the resource.
         *
         * @return Response
         */
        public function index()
        {
                $instance = new Sample();
                $items = $instance->getList();
                return view('sample.index', ['items' => $items]);
        }

        /**
         * Show the form for creating a new resource.
         *
         * @return Response
         */
        public function create()
        {

        }

        /**
         * Store a newly created resource in storage.
         *
         * @return Response
         */
        public function store()
        {

        }

        /**
         * Display the specified resource.
         *
         * @param  int  $id
         * @return Response
         */
        public function show($id)
        {

        }

        /**
         * Show the form for editing the specified resource.
         *
         * @param  int  $id
         * @return Response
         */
        public function edit($id)
        {

        }

        /**
         * Update the specified resource in storage.
         *
         * @param  int  $id
         * @return Response
         */
        public function update($id)
        {
                //
        }

        /**
         * Remove the specified resource from storage.
         *
         * @param  int  $id
         * @return Response
         */
        public function destroy($id)
        {
                //
        }

}
ビューを作成しよう
View用のsampleディレクトリを作るよ
mkdir laravel/resources/views/sample/
index.blade.phpを作成しよう、index.phpじゃないから気をつけて。
$ vi laravel/resources/views/sample/index.blade.php

@extends('layouts.layout')
@section('title', 'サンプルホーム')
@section('content')
 <div class="page-header" style="margin-top:-30px;padding-bottom:0px;">
  <h1><small>サンプル掲示板なのだ</small></h1>
 </div>

 <table id="rowspan" cellspacing="0" class="tablesorter">
        <thead>
                <tr>
                        <th width="10%">サンプルNo.</th>
                        <th width="10%">作成日</th>
                        <th width="22%">ユーザ名</th>
                </tr>
        </thead>
 @foreach($items as $item)
                <tbody>
                <tr><td>{{$item->sample_id}}</td><td>{{$item->create_date}}</td><td>{{$item->user}}</td><td>編集 削除</td></tr>
                </tbody>
 @endforeach
 </table>
 {{ $items->links() }}
@endsection
記述の解説
下記ならforeachでsamplesテーブルのsample_idを取得する
@foreach($items as $item)
{{$item->sample_id}}
@endforeach
“sample_id”の部分は表示したいレコードのカラム名と対応させてね!
ページャの表示
{{ $items->links() }}
これはページャを表示させるんだ!この一行だけで良いんだよ、凄いね!
ルーティングの設定をしよう
$ vi laravel/routes/web.php

Route::get('sample', 'SampleController@index');
http://IPアドレス/sample/
にアクセスするとSampleControllerクラスのindex()関数が発動することを意味するんだ。
さぁ!表示の確認をしよう
うまくいくとページャつきのBootstrapで綺麗に装飾された素敵な画面が待っているはずさ!
http://IPアドレス/sample/
ここまで動作させればフレームワークなしでPHPの掲示板が作れる君ならもう十分な気がするよ。同じように編集や削除といった機能を作っていくだけだよ、それが終わったらLaravelに実装されている様々な機能、ライブラリを組み合わせて君だけのオリジナルシステムが秒速で作れるんだ。わくわくするね!
お疲れ様です。