仮想環境構築ツールのVagrantのご紹介です。
Vagrantってなにもの?
- VirtualBox+Vagrantを利用することで、同一構成の仮想マシンを構築、配布・共有しやすくなります。
- GUIを使わずにファイル上で仮想マシンを構成する機能を備えています。
- エージェントレスで嬉しい。
- パブリック上のマシンもVagrantで操作・管理出来ますよ!
- 差分が出た場合はVagrantfileのプロビショニング機能で対応できる。
※プロビショニングやミドルウェアの導入の部分はAnsible, Chef等に任せると具合が良い。
BOXファイルとVagrantfileの配布で、開発環境をそれぞれのローカルに共有することが出来ます。
Vagrantのダウンロード
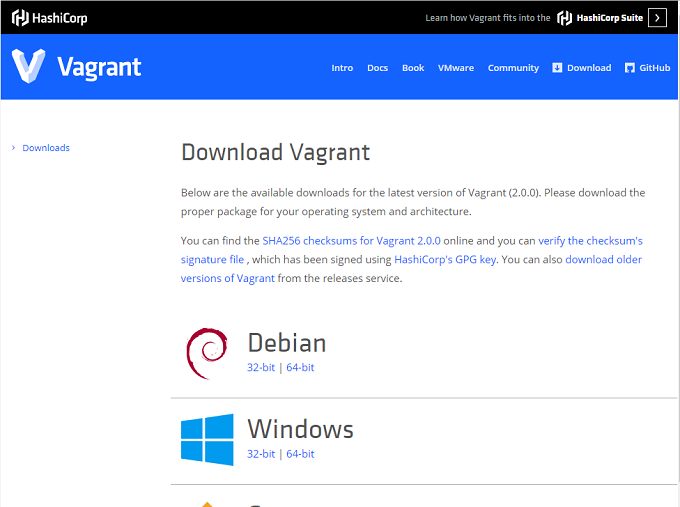
https://www.vagrantup.com/downloads.html
vagrantboxのBOXリポジトリ。※今回は使わない。
https://app.vagrantup.com/boxes/search
Vagrant+Ansibleの組み合わせて使うと具合が良いです。…今回はAnsibleは扱わないですが。
環境
- Windows8.1
- Vmware VirtualBoxインストール済
- CentOS7 iso
少し古いVirtualBoxを使っていて、ぜんぜん上手くいかないな~って時はVirtualBoxを再インストールすると良いかもしれません。それで不具合が解消されたことがあります。
Vagrantインストール
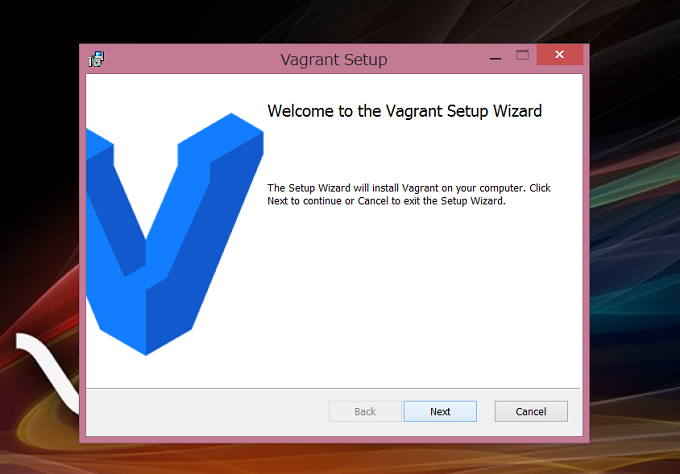
最後に再起動をかけることになります。
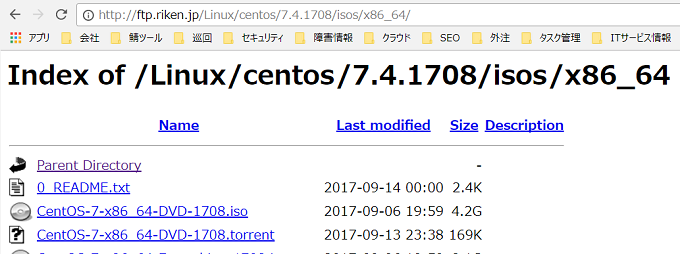
rikenからCentOS7のisoを取得します。
通常通りVirtualBoxでサーバを作成して下さい。
VirtualBox
- 構成:minimum
- ネットワークアダプタ:NAT
- 通信インターフェイス:DHCP
- rootパスワード:vagrant
SSHポートフォワーディング
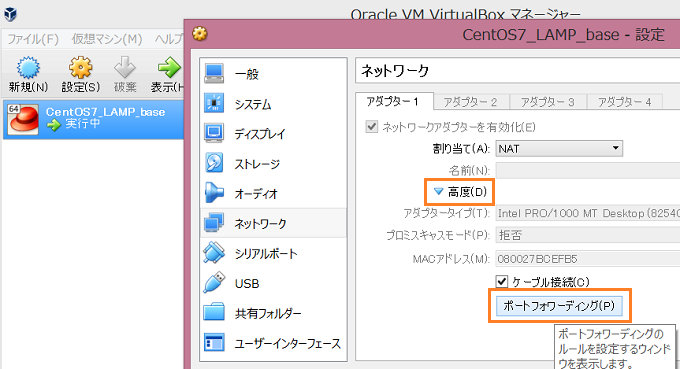
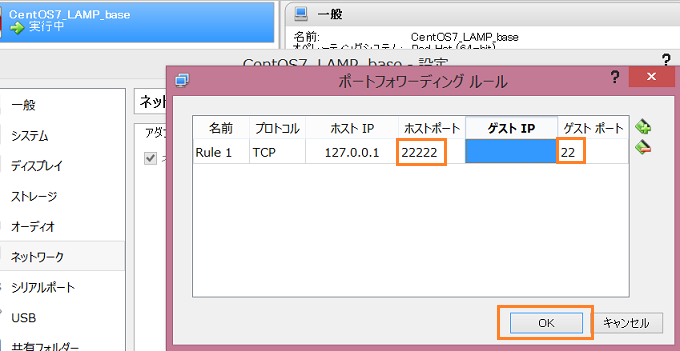
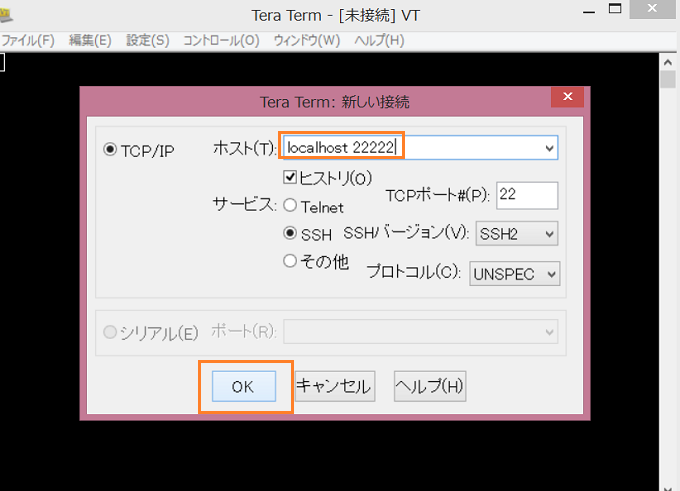
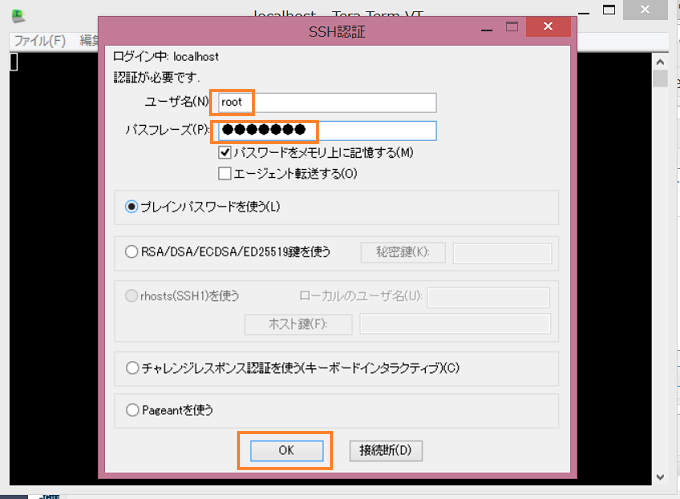
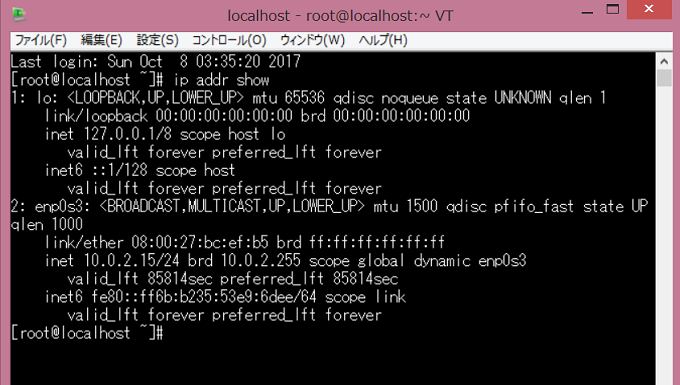
基本インストール
|
1 2 3 4 5 6 7 8 |
# sudo yum groupinstall "Development Tools" "Base" # sudo yum install gcc gcc-c++ pcre-devel zlib-devel make wget openssl-devel libxml2 libxml2-devel libxslt-devel libxslt libxslt-devel gd-devel perl-ExtUtils-Embed GeoIP-devel gperftools-devel flex libmcrypt libtool-ltdl libtidy libXpm libtiff gd-last autoconf automake gmp gmp-devel libgmp.so.3 libssl.so.6 kernel-devel # sudo yum update # reboot now |
|
1 2 3 4 5 6 7 8 9 |
# useradd -m vagrant # passwd vagrant ユーザー vagrant のパスワードを変更。 新しいパスワード: よくないパスワード: このパスワードは 8 未満の文字列です。 新しいパスワードを再入力してください: passwd: すべての認証トークンが正しく更新できました。 |
Vagrant用公開鍵認証キー取得
|
1 2 3 4 5 6 |
mkdir /home/vagrant/.ssh chmod 700 /home/vagrant/.ssh cd /home/vagrant/.ssh curl -k -L -o authorized_keys 'https://raw.github.com/mitchellh/vagrant/master/keys/vagrant.pub' chmod 600 /home/vagrant/.ssh/authorized_keys chown -R vagrant.vagrant /home/vagrant/.ssh |
sudo可能ユーザの設定
|
1 2 3 4 5 6 |
# visudo ## Allow root to run any commands anywhere root ALL=(ALL) ALL vagrant ALL=(ALL) NOPASSWD: ALL |
|
1 |
# su - vagrant |
環境を作って下さい。
省略しましたが、私の場合はシンプルなLAMP環境を作りました。
Guest Additions CD
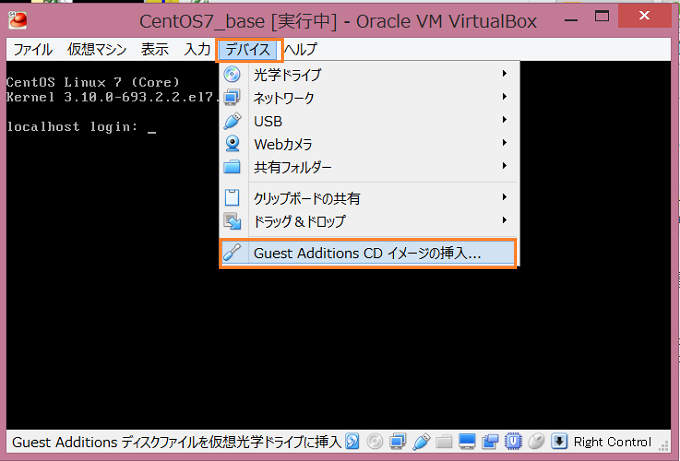
【デバイス】>> 【Guest Additions CDイメージの挿入】を選択します。
ログアウトしてrootに戻ります。
|
1 |
$ exit |
root権限で実行します。
|
1 2 3 4 5 6 7 8 9 10 11 12 13 14 15 16 17 18 19 20 21 22 23 24 25 26 27 28 29 30 31 32 33 34 35 36 37 |
mkdir /media/cdrom mount -r /dev/cdrom /media/cdrom sh /media/cdrom/VBoxLinuxAdditions.run Verifying archive integrity... All good. Uncompressing VirtualBox 5.0.24 Guest Additions for Linux............ VirtualBox Guest Additions installer Removing installed version 5.0.24 of VirtualBox Guest Additions... Removing existing VirtualBox non-DKMS kernel modules[ OK ] Broadcast message from systemd-journald@localhost.localdomain (Sun 2017-10-08 06:42:26 JST): dracut[1456]: Can't write to /boot/initramfs-: Directory /boot/initramfs- does not exist or is not accessible. Message from syslogd@localhost at Oct 8 06:42:26 ... dracut:Can't write to /boot/initramfs-: Directory /boot/initramfs- does not exist or is not accessible. Broadcast message from systemd-journald@localhost.localdomain (Sun 2017-10-08 06:42:26 JST): dracut[1518]: Can't write to /boot/initramfs-: Directory /boot/initramfs- does not exist or is not accessible. Message from syslogd@localhost at Oct 8 06:42:26 ... dracut:Can't write to /boot/initramfs-: Directory /boot/initramfs- does not exist or is not accessible. Copying additional installer modules ... Installing additional modules ... Removing existing VirtualBox non-DKMS kernel modules[ OK ] Building the VirtualBox Guest Additions kernel modules Building the main Guest Additions module[ OK ] Building the shared folder support module[ OK ] Building the graphics driver module[ OK ] Doing non-kernel setup of the Guest Additions[ OK ] Starting the VirtualBox Guest Additions Installing the Window System drivers Could not find the X.Org or XFree86 Window System, skipping. [ OK ] |
|
1 |
# umount /media/cdrom |
Udev削除
|
1 2 3 |
rm -f /etc/udev/rules.d/70-persistent-net.rules rm -rf /dev/.udev/ rm -f /lib/udev/rules.d/75-persistent-net-generator.rules |
再起動を行います。
|
1 |
$ sudo shutdown now |
好みでポートフォワードの設定を削除する。
BOXのパッケージ化を行います。
|
1 2 3 4 5 6 7 8 |
BOXのパッケージ化 vagrant package --base CentOS7_LAMP_base Vagrantに登録 vagrant box add --name CentOS-7-x86_64-minimal-ja-LAMP-PHP70-MySQL56 package.box 確認 vagrant box list |
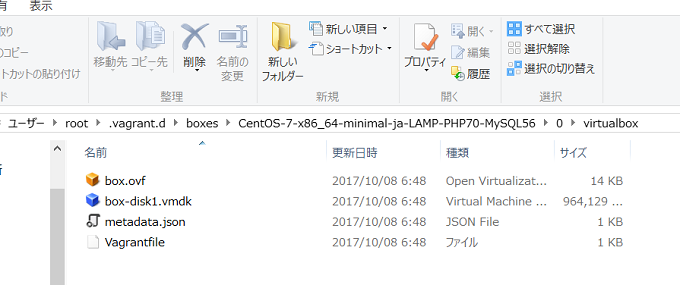
実態ファイル
|
1 2 |
C:\Users\root\.vagrant.d\boxes C:\Users\root\.vagrant.d\boxes\CentOS-7-x86_64-minimal-ja-LAMP-PHP70-MySQL56\0\virtualbox |
別のPCにて作業
Windows Vagrantをインストールしておく。
BOXファイルを下記に設置する。
|
1 |
C:\Users\yuu\.vagrant.d\boxes\ |
BOXをaddでVagrantに登録します。
|
1 |
C:\Users\yuu\> vagrant box add CentOS-7-x86_64-minimal-ja-LAMP-PHP70-MySQL56 package.box |
※オリジナルの場所で模擬的に検証する場合
|
1 2 |
C:\Users\root\package.boxをpackage.box_orgにリネーム C:\Users\root\Vagrantを削除 |
BOXの確認
|
1 2 3 |
C:\Users\root>vagrant box list CentOS-7-x86_64-minimal-ja-LAMP-PHP70-MySQL56 (virtualbox, 0) |
|
1 |
C:\Users\yuu>vagrant init CentOS-7-x86_64-minimal-ja-LAMP-PHP70-MySQL56 |
設定の雛型、vagrantfileが作成される。
指定したBOXから仮想サーバを作成する
|
1 2 3 4 5 6 7 8 9 10 11 12 13 14 15 16 17 18 19 20 |
C:\Users\yuu>vagrant up Bringing machine 'default' up with 'virtualbox' provider... ==> default: Importing base box 'CentOS-7-x86_64-minimal-ja-LAMP-PHP70-MySQL56'. .. ==> default: Matching MAC address for NAT networking... ==> default: Setting the name of the VM: root_default_1507431569317_37323 ==> default: Clearing any previously set network interfaces... ==> default: Preparing network interfaces based on configuration... default: Adapter 1: nat ==> default: Forwarding ports... default: 22 (guest) => 2222 (host) (adapter 1) ==> default: Booting VM... ==> default: Waiting for machine to boot. This may take a few minutes... default: SSH address: 127.0.0.1:22222 default: SSH username: vagrant default: SSH auth method: private key default: default: Vagrant insecure key detected. Vagrant will automatically replace default: this with a newly generated keypair for better security. |
作成できました。
SSHにてログイン

|
1 |
> vagrant ssh |
Virtualboxの設定からネットワークをブリッジアダプタに変更する。これでブラウザからWEBサーバについても確認できる。
プロビショニングする場合
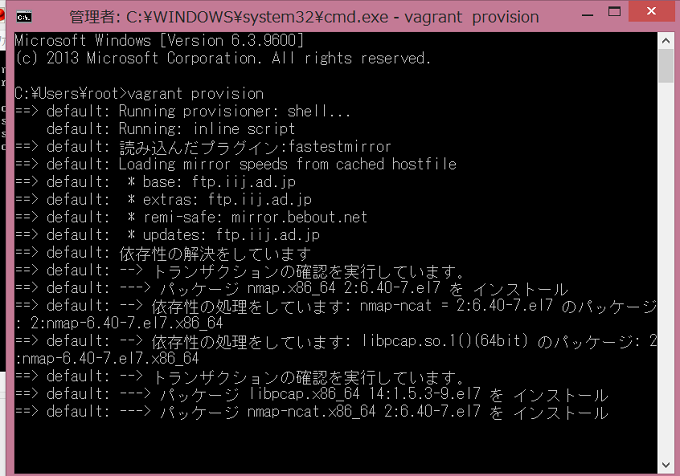
Vagrantファイルを各自に配布して、vagrant provisionコマンドを実行して貰う。
|
1 2 3 4 5 6 7 8 9 10 11 12 13 14 15 16 17 18 19 20 21 22 |
C:\Users\root\Vagrant # -*- mode: ruby -*- # vi: set ft=ruby : ## 追加 script = <<SCRIPT yum install -y nmap SCRIPT Vagrant.configure("2") do |config| config.vm.box = "CentOS-7-x86_64-minimal-ja-LAMP-PHP70-MySQL56" ##追加 config.vm.provision :shell, :inline => script end |
|
1 |
> vagrant provision |
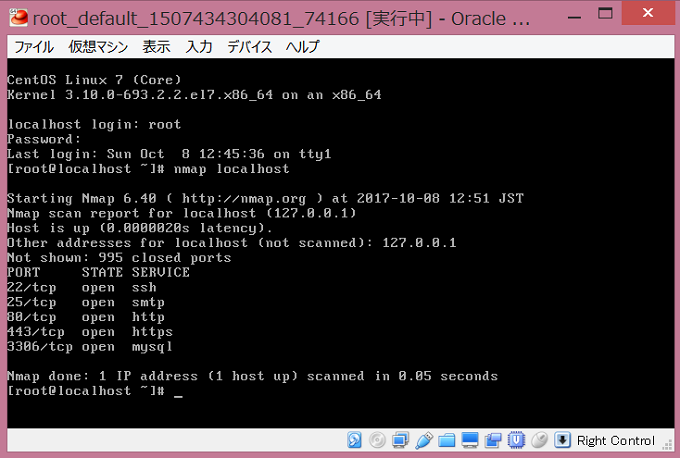
Vagrantでゲストを立ち上げて、プロビショニングの部分を、構成管理ツールであるAnsibleなどで役割分担させてあげると具合が良いです。
お疲れ様です。


