初期設定
net-toolsは非推奨らしいですが、私は愛用しているのでいれちゃいます。
[bash] # yum install net-tools[/bash]
インストール時にDHCPをONにしなかった場合はNICの設定が必要です
[bash] # cd /etc/sysconfig/network-scripts/# ls
[/bash]
ifcfg-enpなんとかっていうのを見つける。
[bash] # vi ifcfg-enp0s3ONBOOT=yesに変更
DNS=8.8.8.8←追加します。
[/bash]
リゾルバの設定を行います。
[bash] # vi /etc/resolv.confnameserver 8.8.8.8←追加する。
[/bash]
再起動で読み込ませます。
[bash] # systemctl network restart[/bash]
これで初期設定はおしまいです。
アップデートを行います。
[bash] # yum update[/bash]
SSHのリモート設定
設定ファイルを編集します。
[bash] # vi /etc/ssh/sshd_config[/bash]
rootでのログインを禁止します。
PermitRootLogin no ←(noに変更します。
ポートは22以外にすると効果的です。
#Port 22
#AddressFamily any
#ListenAddress 0.0.0.0
#ListenAddress ::
Port 11122←追加します。
割愛しますが、公開鍵認証にするともっと効果的です。
SSH通信用の穴をあけます。
firewalldは今回使用はしません。
-A INPUT -p tcp -m state –state NEW -m tcp –dport 22 -j ACCEPT
-A INPUT -p tcp -m state –state NEW -m tcp –dport 11122 -j ACCEPT←追加します。
[/bash]
再起動で設定を読み込ませます。
[bash] # systemctl restart iptables# systemctl restart sshd
# systemctl enable sshd
[/bash]
以下はWindwos teratermからの作業となります。
ユーザーディレクトリ設定。
■ ホームディレクトリの初期設定です。
[bash] # mkdir /etc/skel/public_html# chmod 755 /etc/skel/public_html
[/bash]
■ メールディレクトリ設定
[bash] # mkdir -p /etc/skel/Maildir/{new,cur,tmp}# chmod -R 700 /etc/skel/Maildir/{new,cur,tmp}
[/bash]
管理者メール通知設定(postfixでメールサーバを建てる予定がない場合)
[bash] # vi /etc/aliases# trap decode to catch security attacks
#decode: root←#を行頭に追加してコメントアウト
# Person who should get root’s mail
#root: marc
root: kanrisha@gmail.com←root宛アドレスを設定
[/bash]
エイリアス設定を反映させる専用のコマンドを入力します。
[bash] # newaliases[/bash]
mailコマンドインストール
[bash] # yum -y install mailx[/bash]
postfixの削除を行います。
[bash] # yum remove postfix[/bash]
通知用のsSMTPインストール
[bash] # rpm -ivh http://ftp.riken.jp/Linux/fedora/epel/6/x86_64/epel-release-6-8.noarch.rpm# yum -y update epel-release
# yum –enablerepo=epel install ssmtp
インストール:
ssmtp.x86_64 0:2.61-21.el6
[/bash]
sSMTP設定ファイル編集
[bash] # vi /etc/ssmtp/ssmtp.conf※Gmailアカウント情報を記入し末尾に以下を追加
Mailhub=smtp.gmail.com:587
UseSTARTTLS=YES
AuthUser=youracount@gmail.com←設定して下さい
AuthPass=yourpassword←設定して下さい
AuthMethod=LOGIN
TLS_CA_File=/etc/pki/tls/certs/ca-bundle.crt
[/bash]
root宛でGmailに届くか確認を必ず行います。
[bash] # echo “This is a test mail.”|mail -s “Test mail” root[/bash]
サーバ名変更
# vi /etc/hostname
yuuserver
SELINUX無効化
[bash] # vi /etc/sysconfig/selinuxSELINUX=disabled ←変更
[/bash]
再起動で設定を読み込ませます。
[bash] # reboot[/bash]
これでSELINUXとホスト名が反映される。
Webサーバインストール
[bash] # yum install httpd[/bash] [bash] # vi /etc/sysconfig/iptables
-A RH-Firewall-1-INPUT -m state –state NEW -m tcp -p tcp –dport 21 -j ACCEPT
[/bash]
[bash]
# vi /etc/httpd/conf/httpd.conf
# finding out what major optional modules you are running
ServerTokens Prod ←OSをProdに変更しました サーバー情報を出さないようにする
# Set to one of: On | Off | EMail
#
ServerSignature Off ←Offに変更。 サーバー情報を出さないようにする。
Options -Indexes MultiViews FollowSymLinks ←『-』をIndexesの前に追加する。
[/bash]
[bash]
# systemctl restart iptables
# systemctl restart httpd
# systemctl enable httpd
[/bash]
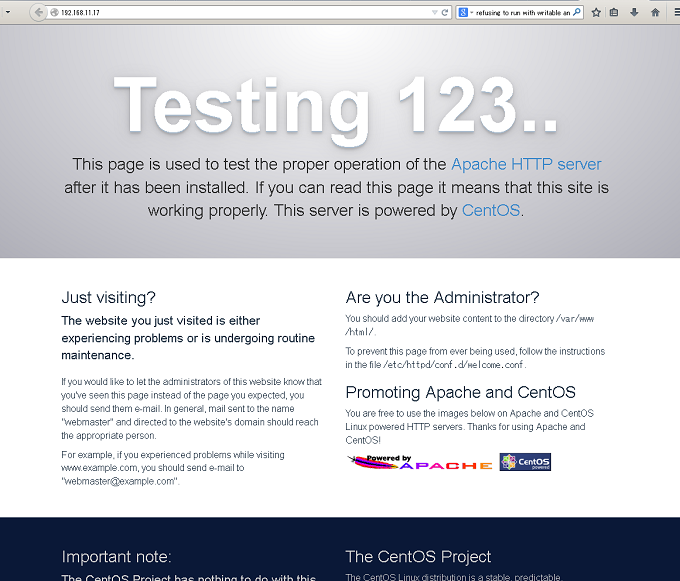
以下のURLにアクセスして確認します。
http://localhost/
PHPインストール
[bash] # yum -y install php-mysql php php-gd php-mbstring[/bash]
MariaDBをインストール
CentOS7からデフォルトのSQLがMariaDBに移行しました。
インストールを行います
[bash] yum -y install mariadb mariadb-server[/bash]
日本語化設定を行います。
[bash] # vi /etc/my.cnf [mysqld] datadir=/var/lib/mysqlsocket=/var/lib/mysql/mysql.sock
user=mysql
# Disabling symbolic-links is recommended to prevent assorted security risks
symbolic-links=0
character-set-server = utf8 ←追加
[/bash]
設定を読み込ませます。
[bash] # systemctl restart mariadb# service mariadb restart
[/bash]
自動起動設定を忘れずに行います。
[bash] # systemctl enable mariadb[/bash]
初期設定プログラムを起動します。
[bash] # mysql_secure_installationEnter current password for root (enter for none): (Enterキーを入力を入力します
Set root password? [Y/n] ← (ENTERキーを入力します)
New password: ←(rootのパスワードを入力します)
Re-enter new password: ←(rootのパスワードを再入力します)
Password updated successfully!
Reloading privilege tables..
… Success!
他はすべてEnter
[/bash]
ログイン出来るか確認してください。
[bash] # mysql -u root -p[/bash]
※エラー2002なら
[bash] # ls -l /var/lib/mysql/合計 0
[/bash]
[bash] # touch /var/lib/mysql/mysql.sock
# systemctl restart mariadb
[/bash]
エラー1045なら
[bash] # mysql> update user set password=PASSWORD(‘任意のパスワード’) where user=’root’ and host=’localhost’;[/bash] [bash] mysql> flush privileges;
mysql> exit;
# systemctl restart mariadb
[/bash]
phpMyAdmin
直接wgetでダウンロードします。
[bash] # wget http://sourceforge.net/projects/phpmyadmin/files/phpMyAdmin/4.1.13/phpMyAdmin-4.1.13-all-languages.zip[/bash]
zipの解凍を行います。
[bash] # unzip phpMyAdmin-4.1.13-all-languages.zip[/bash]
まず確認をします。
[bash] # lsphpMyAdmin-4.1.13-all-languages phpMyAdmin-4.1.13-all-languages.zip
[/bash]
元ファイルは必要ないので削除します。
[bash] # rm -rf phpMyAdmin-4.1.13-all-languages.zip[/bash]
移動させてリネームします。
[bash] # mv phpMyAdmin-4.1.13-all-languages /var/www/html/phpmyadmin[/bash]
設定サンプルをコピーして設定ファイルを作成します。
[bash] # cp /var/www/html/phpmyadmin/config.sample.inc.php /var/www/html/phpmyadmin/config.inc.php[/bash]
パーミッション設定を行います。
緩いとエラーになります。
[/bash]
ハッシュとutf-8の日本語化の設定です。
[bash] # vi /var/www/html/phpmyadmin/config.inc.php$cfg[‘blowfish_secret’] = hogehogepasssssr;←適当に変更
//$cfg[‘DefaultLang’] = ‘en’;
//$cfg[‘DefaultLang’] = ‘de’;
$cfg[‘Lang’] = ‘ja-utf-8’; ←(日本語化するために追加記述します
[/bash]
Apacheに所属させます。
[bash] # chown -R root:apache /var/www/html/phpmyadmin/[/bash]
phpMyAdmin起動用Apache設定ファイルを編集します。
[bash] # vi /etc/httpd/conf.d/phpmyadmin.confAlias /xxxphpmyadmin /var/www/html/phpmyadmin
<Directory “/var/www/html/phpmyadmin”>
Options FollowSymLinks
AllowOverride All
Order Deny,Allow
Deny from all
Allow from 127.0.0.1
Allow from all←すべて許可
設定を読み込ませます。
[bash] # systemctl httpd restart[/bash]
以下にアクセスして確認します。
http://サーバーIP(localhost)/phpmyadmin/
FTPサーバインストール
vsftpdをインストールします。
[bash] # yum install vsftpdインストール:
vsftpd.x86_64 0:3.0.2-9.el7
[/bash]
設定を行います。
[bash] # vi /etc/vsftpd/vsftpd.conf匿名でのログインは禁止です。
anonymous_enable=NO
#アスキーモードの仕様の設定。お好みで
ascii_upload_enable=YES←行頭の#をはずして有効化
ascii_download_enable=YES←行頭の#をはずして有効化
#chroot_local_user=YES
#chroot_list_enable=YES
# (default follows)
chroot_list_file=/etc/vsftpd/chroot_list←行頭の#をはずして有効化
ディレクトリごと一括での転送を有効化する
ls_recurse_enable=YESt←行頭の#をはずして有効化
IPv4をリッスンする。
listen=YES
IPv6はリッスンしない
listen_ipv6=NO
#/etc/vsftpd/user_listのユーザーだけを許可。
userlist_deny=NO
#設定を簡単にするためにPASVのポート範囲を限定。
pasv_min_port=50000
pasv_max_port=50030
#ユーザーの初期アクセスディレクトリ。(無効にしています、設定したい人は解除して下さい)
#wwwで/home/ユーザー名/www
#local_root=www
#ユーザのホームディレクトリより上位のディレクトリへの移動を不許可に。
chroot_local_user=YES
#.ファイルをアップ可能に
force_dot_files=YES
#ログの形式をvsftpd.logに、ログイン時の記録も取る。
xferlog_file=/var/log/vsftpd.log
xferlog_std_format=NO
log_ftp_protocol=YES
#refusing to run with writable anonymous root inside chroot()対策 ※CentOS7から
allow_writeable_chroot=YES
[/bash]
chrootユーザーリスト編集します。
[bash] # vi /etc/vsftpd/user_list# for users that are denied.
root
hogeuser ←hogeuserユーザーを追加する。
bin
daemon
adm
lp
sync
shutdown
halt
mail
news
uucp
operator
games
nobody
[/bash]
wheelユーザーの許可を行います。
[bash] # vi /etc/pam.d/su#%PAM-1.0
auth sufficient pam_rootok.so
# Uncomment the following line to implicitly trust users in the “wheel” group.
#auth sufficient pam_wheel.so trust use_uid
# Uncomment the following line to require a user to be in the “wheel” group.
auth required pam_wheel.so use_uid ←(#を外してコメントを有効にします。
[/bash]
vsftpd用の穴をあけます。
[bash] # vi /etc/sysconfig/iptables追加します。
-A RH-Firewall-1-INPUT -m state –state NEW -m tcp -p tcp –dport 20 -j ACCEPT
-A RH-Firewall-1-INPUT -m state –state NEW -m tcp -p tcp –dport 21 -j ACCEPT
-A RH-Firewall-1-INPUT -m state –state NEW -m tcp -p tcp –dport 50000:50030
[/bash]
chroot除外ユーザーを設定します。
[bash] # vi /etc/vsftpd/chroot_listhogeuser←追加します。
[/bash]
ユーザーのフォルダのパーミッションを一応設定します。
[bash] # chmod 755 /home/hogeuser# systemctl restart vsftpd
# systemctl enable vsfrpd
[/bash]
これで構築ができました☆
トラブルシューティング
■ 500 OOPS: vsftpd: refusing to run with writable anonymous root inside chroot()対策
chrootで指定した中にrootのディレクトリ入れないでください!><
と注意されてます。
vsftpdのバージョンがあがってこのチェックが導入されたようです。
[bash] # vi /etc/vsftpd/vsftpd.confallow_writeable_chroot=YES←追加します。
[/bash]
[bash]
# systemctl restart vsftpd
# systemctl enable vsfrpd
[/bash]
長くなりましたがひとまずLAMP環境を構築できました☆

